
How To Needlepoint
Needlepoint.Com offers a wide range of complimentary tips, tricks, and tutorials for stitchers of all experiences to develop and enhance their skills. Here, you’ll find all the essential steps for starting a needlepoint project and some common needlepoint stitches.

Needlepoint 101
Whether you’re new to needlepoint or simply want a refresher, here’s everything you need to know about starting your kit or canvas. You can also contact Needlepoint.Com’s dedicated team of experts for additional assistance by calling 919-828-5538, Monday through Friday, from 9:00am-5:00pm EST. You can also download this printable PDF to keep as a guide.
Cut Your Thread
Cut a strand from the skein of thread. We suggest cutting your thread so that it is the length of your finger to your elbow - or no longer than 18".
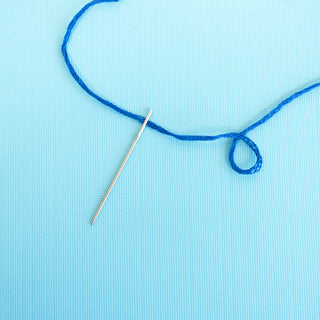
Thread your needle
Fold the thread over the needle in between your thumb and index finger, and pinch the end of your thread so that it is folded over onto itself. Remove the needle from between the thread. Take the folded thread and push it through the eye of the needle. Another option is to push the end of the thread through the eye of the needle. If the end of the thread has frayed, twist it to make it tighter and eliminate the fray (or trim the end with scissors) before pushing it into the eye of the needle.
Start your threads
Tie a knot in the end of the thread farthest from the eye of the needle. This is called a “waste knot.” Place the waste knot on top of the canvas by pushing your needle through the canvas from front to back, roughly an inch away from where you plan to start stitching.
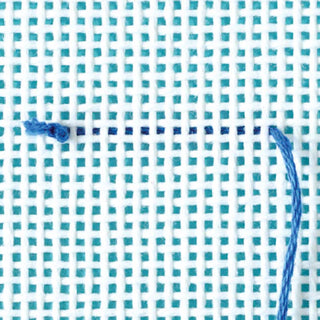
Begin stitching
Using one of the stitches below, stitch over the "tail" of the waste knot (the thread on the back of the canvas) to lock your thread into the canvas. Once you have stitched up to the waste knot, cut the knot off the front of the canvas. Be careful not to cut the canvas itself!
Ending your thread
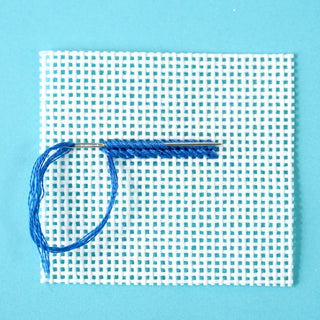
Once you have finished stitching a particular area, or your thread has become too short, you will need to end your thread. Flip your canvas over. With the needle and thread on the back of the canvas, run your needle through the previously placed stitches. Trim off the excess thread with embroidery scissors.
Starting another thread
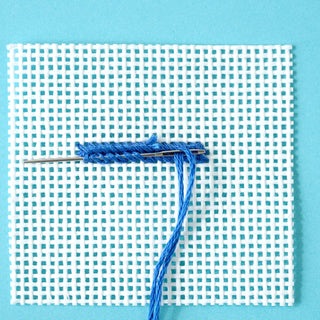
Once you have stitched a substantial area of canvas, there is no need to do a waste knot. You can start your thread by running it under four or five of your previously placed stitches in the same way that you learned to end your thread. Repeat this action a second time in order to securely lock in the thread before you begin stitching.
Recommended needlepoint stitches for beginners
Fill in all the color areas of your canvas using either of the stitches listed below. You can start stitching anywhere on your canvas, but beginners often find it easier to stitch in the smallest color areas first.

the Continental Stitch
This basic needlepoint stitch is worked in horizontal rows of Tent Stitches, or any stitch that looks like those in the accompanying diagram to the right. It is a simple stitch that can be used anywhere on your canvas. Pay attention to the numbering on the stitch diagram to the right.
The Continental Stitch is a great way to learn needlepoint for beginners, as it follows logical, easy-to-learn horizontal lines. You can also use the Continental Stitch to fill in small areas or single lines of stitches, and even your entire project. Once you have mastered this stitch and have become more familiar with needlepoint, we recommend adding the Basketweave Stitch to your skill set and using it as much as possible.


Basketweave Stitch
The Basketweave Stitch is also made up of Tent Stitches, and looks the same as the Continental Stitch on the front side of the canvas. The difference is the basket-like appearance of the stitches on the opposite side of the canvas, which provide good coverage with minimal distortion.
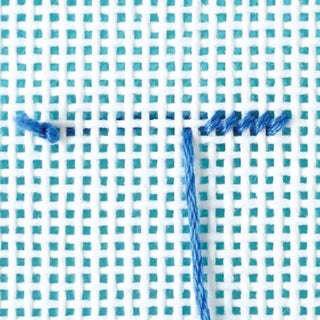
When looking closely at your canvas, you should see that its threads weave over and under each other. The "poles" are the vertical threads that sit on top of the underlying horizontal threads (in red [above/to the left/to the right/below]) and the "steps" are the horizontal threads that sit on top of the underlying vertical threads (in blue to the left).
When using the Basketweave Stitch, you will “slide down” the poles and “step up” the steps. In other words, work down in a diagonal line on the pole intersections of the canvas, and work up a diagonal line on the step intersections of the canvas.
You can get even more in-depth instructions by taking our How to Needlepoint Online Class, created especially with beginners in mind. We also recommend signing up for our weekly emails at the bottom of the page. You'll receive stitching tips, new design inspiration, sale notifications, and special deals, plus a coupon code for 15% off your first order!
More stitching excitement awaits!
Decorative stitches can be used to add additional interest to your canvas with fun textures and patterns.

Stitch For Backgrounds
Diagonal Mosaic Stitch

Stitch For Backgrounds
Diagonal Scotch Stitch

Stitch For Skies
Skip Tent Stitch

Stitch For Ground
Horizontal Single Brick Stitch

Stitch For Circles
Rhodes Circle Stitch

Stitch For Squares
Mosaic Stitch

How to Needlepoint Beginner Sampler Kit
This kit includes everything you need to master the two foundational stitching techniques, Tent Stitch and Basketweave Stitch. Practice your skills on a printed canvas with basic shapes and letters.
ready to get started? shop beginner kits


